
How to Optimize Images for Web and Performance
It has been a year since I switched to a full-time performance role. I like performance from every angle: capacity testing, server benchmarking, and user-centric metrics.
Last month I bought Image Optimization by Addy Osmani so I could help other teams ship images that render efficiently. I got through about 200 pages and wanted to measure the difference immediately: how much you lose by picking the wrong format, or by uploading an image with no compression.
That is where imagesperf.vercel.app came from.
Fork vitaliimelnychuk/images-performance and edit the image list in components/ImageList/data.js if you want to compare your own images.
Always have a checklist
A checklist is a good way to add habits you have not practiced yet. Running through it before a change goes live leads to steady improvement.
Slow images hurt users as much as poor image quality. People want the content quickly, even on a slow connection. A few techniques get you most of the way there without disappointing them.
Here is the order I use, from the changes that matter most to the ones you can leave for later:
- Resolution
- Quality
- Format (JPEG, PNG, WebP)
- Rendering that matches the screen
- A low-quality preview
How does resolution affect users?
Resolution is the first thing I look at. The right size cuts the download and the time the browser spends decoding the image. Smaller is faster.
Open imagesperf.vercel.app and you will see a list of lazy-loaded images. It is only a sample page. The same layout could be a product grid or a blog post. The filters at the top are wired to the URL.
For the tests I used WebPageTest with the same settings each time:
- Location: Virginia
- Device: Browser
- Connection: 3G
- Number of tests to run: 5
A few minutes of work can make the page about 10 times faster without a visible quality drop.
Images with no optimization
The first run used this configuration:
- Quality: 100
- Fit: clip
- Width: 2048
- Height: 1536
- Format: jpg
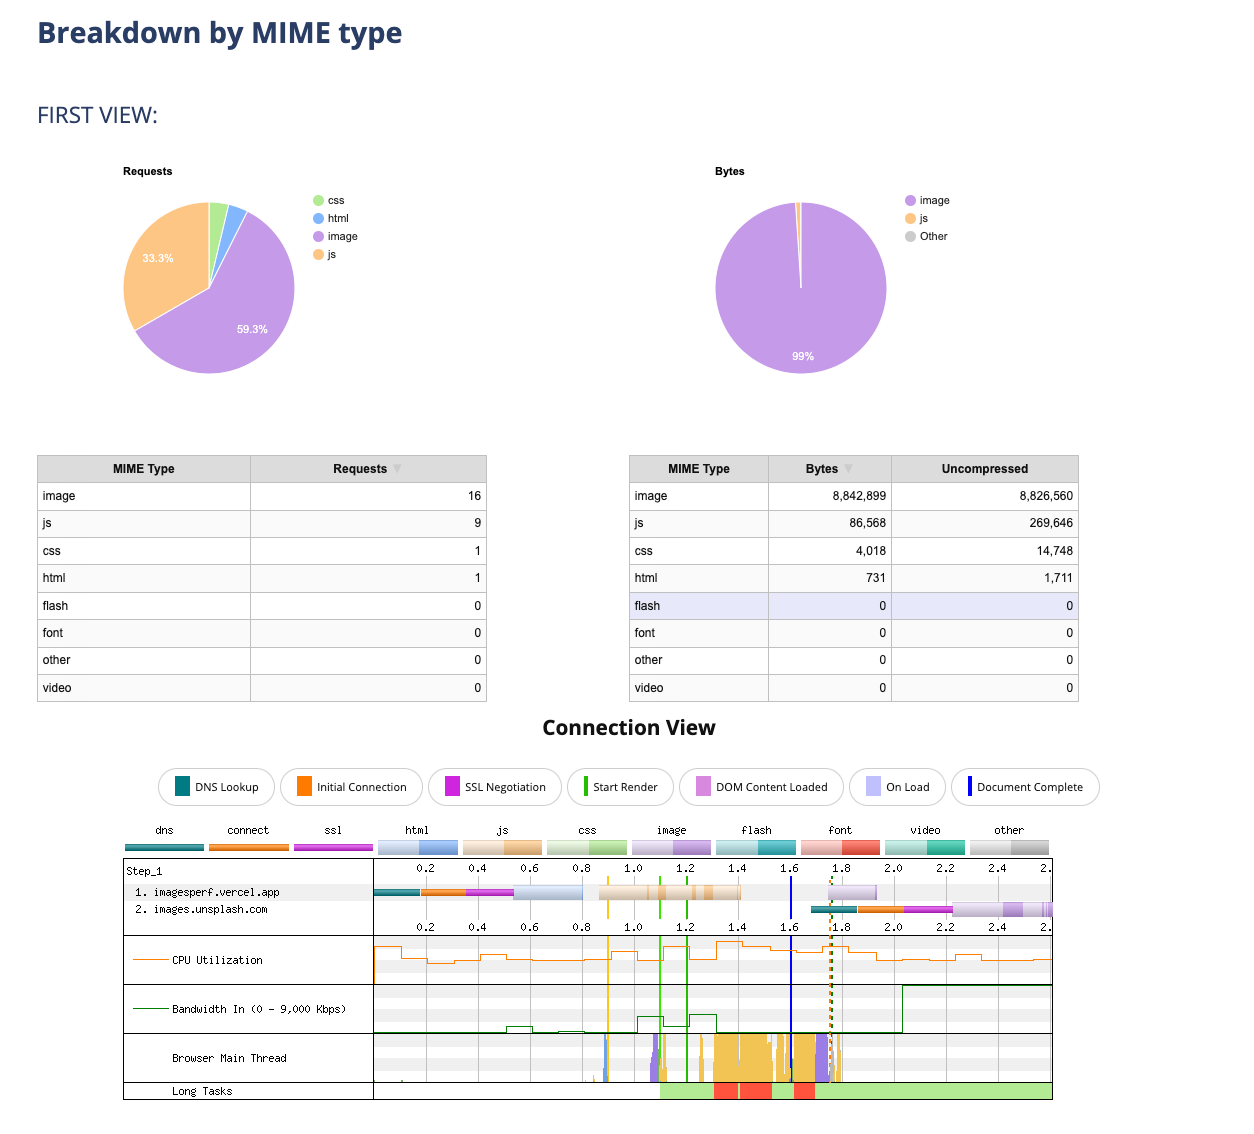
The chart below is the original load of 16 images with no optimization. The page pulls them from Unsplash and renders them asynchronously.
Turn on compression
A lot could be improved. These are the changes that matter most.
Set image quality to 70
- Quality: 70
- Fit: clip
- Width: 2048
- Height: 1536
- Format: jpg
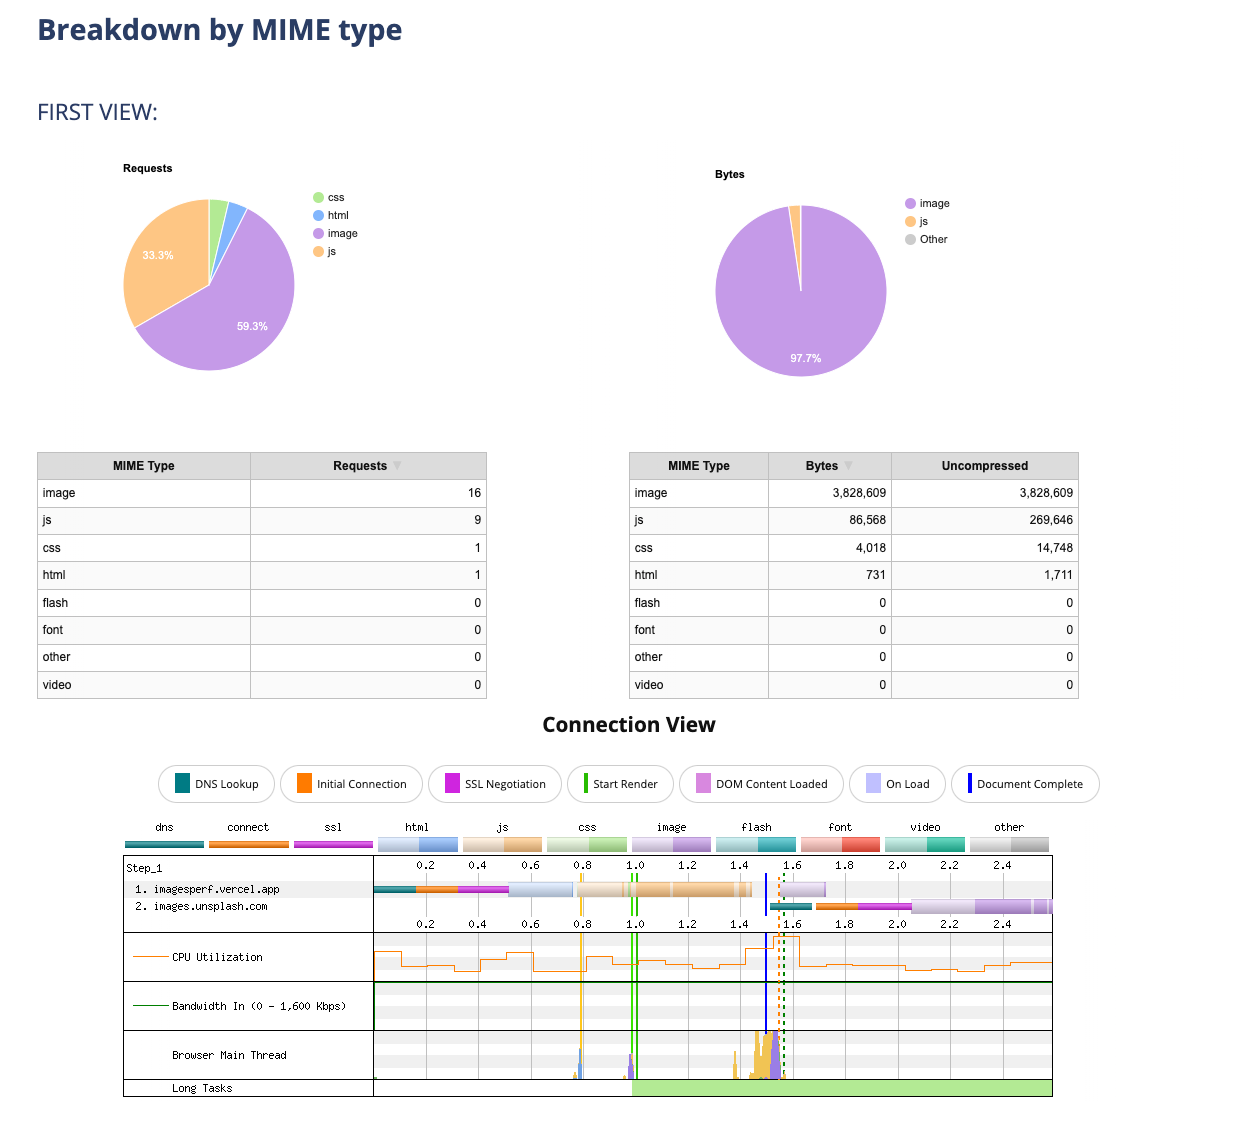
Dropping the quality brings the page down to about 3.8 MB, which is less than half the original size.
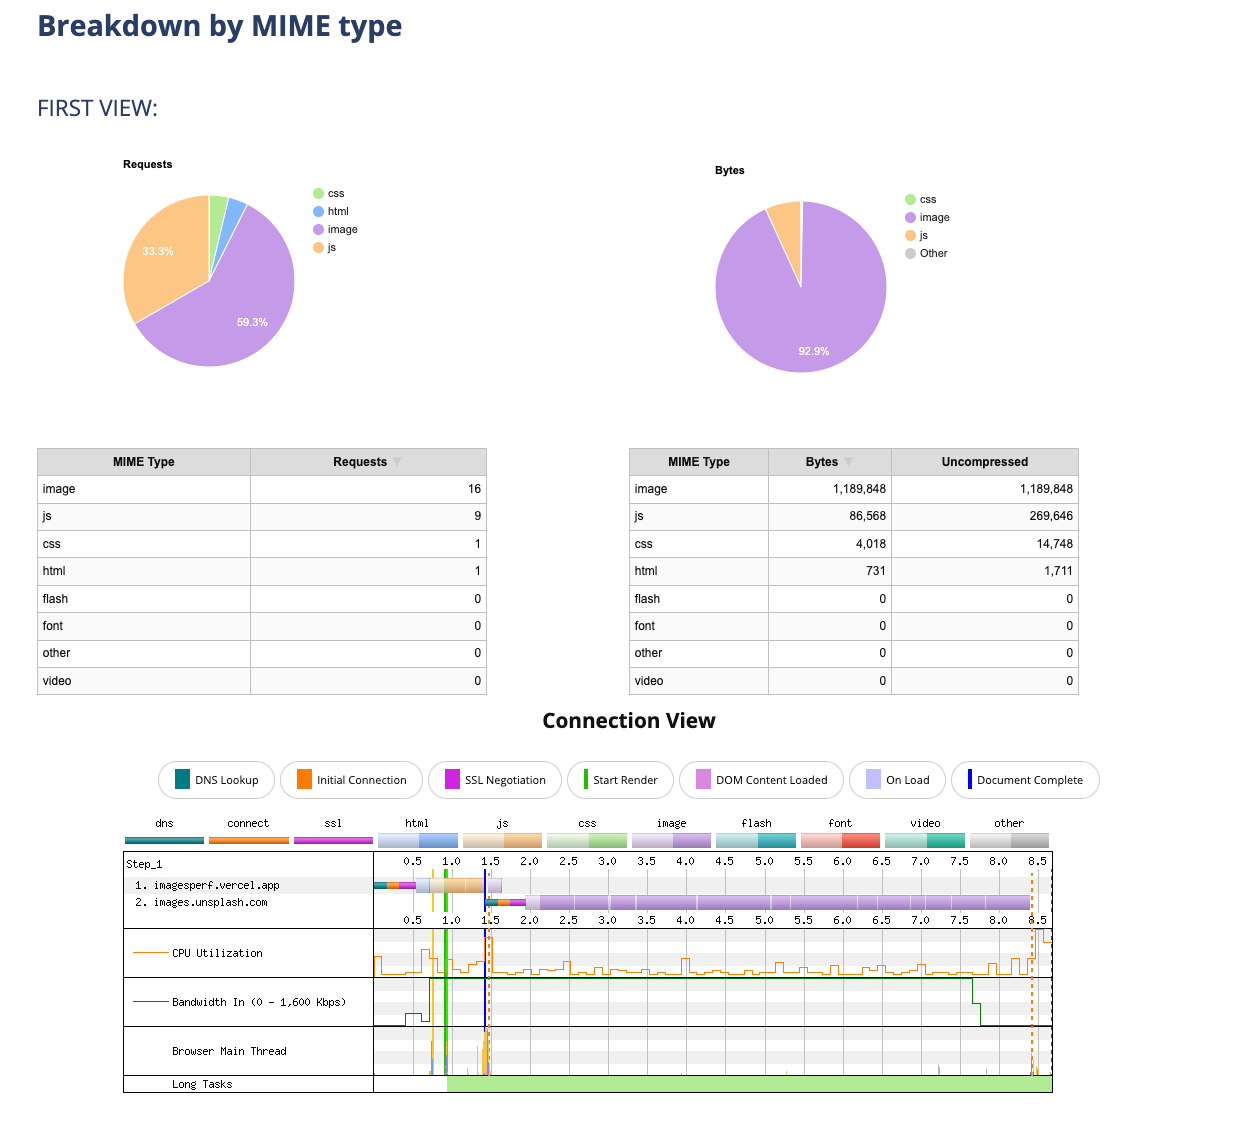
Use a smaller resolution
- Quality: 70
- Fit: clip
- Width: 1024
- Height: 756
- Format: jpg
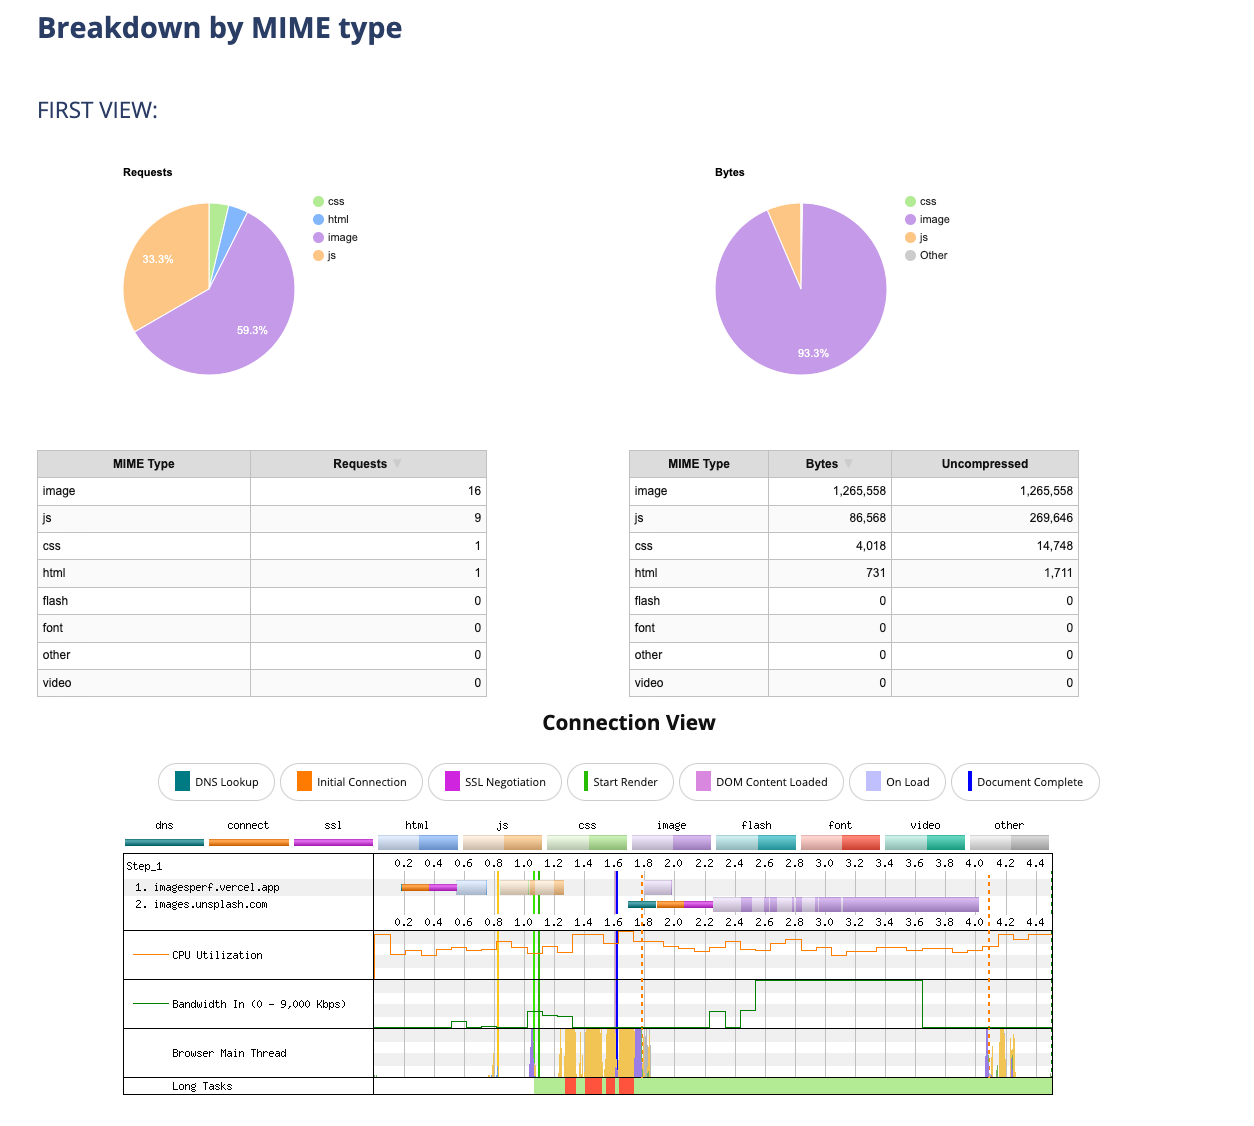
Use WebP
- Quality: 70
- Fit: clip
- Width: 1024
- Height: 756
- Format: webp
Use AVIF
- Quality: 70
- Fit: clip
- Width: 1024
- Height: 756
- Format: avif
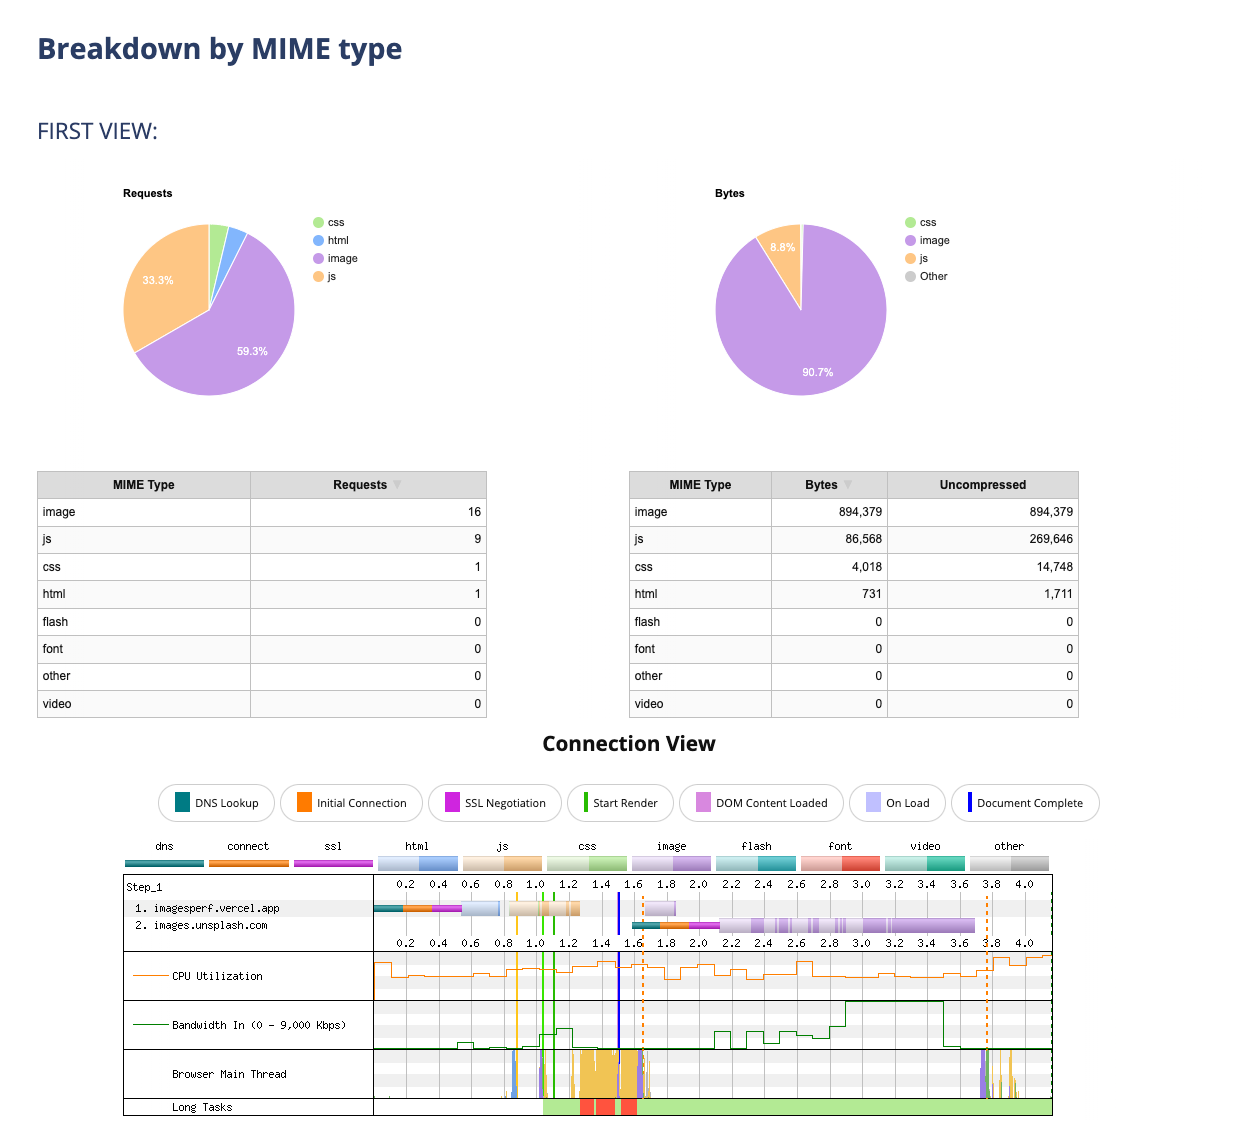
Read the results
Most pages depend on images to explain the product. Nobody wants to ship blurry pictures, but "good enough" is often far smaller than the original file.
Changing resolution and format moves page weight a lot, and none of that requires an application rewrite. WebP and AVIF are not supported everywhere, and you can still serve them where the browser accepts them.
- https://caniuse.com/avif
- https://caniuse.com/webp
Checklist
The first step toward automation is a checklist you can run by hand. This is what I use for the critical image issues. GitHub pull request templates are a good place to keep it.
- Is image compression enabled?
- Do we ship different resolutions for phone, tablet, and laptop?
- Do we pick the best format for the user's browser?
Also look at calibreapp/image-actions if you want compression to run as part of the build.
Conclusion
Images are harder than they look. These are simple optimizations you can do even when you are working alone and do not have time to make everything perfect.
A few more places to go deeper:
- calibreapp/image-actions compresses images in CI.
- Performance budgets
- tkadlec/grunt-perfbudget
- Use Lighthouse for performance budgets
- Lighthouse
- Books